Creating this blog led me to learn a few things about how to set up a site with Jekyll. It only makes sense that I get meta with my first proper contribution and tell you how I did it.
In this post, I’ll cover:
- Installing Jekyll and starting a project
- Navigating around a Jekyll project
- Adding a post
Getting Started with Jekyll
Here are all five of the steps to setting up a local Jekyll site:
- If you don’t have Ruby installed, install Ruby:
brew install ruby(OSX) - Install Jekyll:
gem install jekyll - Create a Jekyll project locally:
jekyll new my-awesome-site - Navigate into your new project:
cd my-awesome-site - Serve your project locally:
jekyll serve
You will find your site running at: http://localhost:4000.
I’m hosting this site on GitHub pages and redirecting to a custom domain. I’m not going to cover that today, but I will in a future post.
Navigating around Jekyll
This is what your project might look like:

Keep three things in mind as you start working in your Jekyll project:
- Do not edit anything in the _site directory
- Do not edit anything in the _site directory
- Do not edit anything in the _site directory
The _site directory is your generated public directory. You generally don’t want to mess with generated files.
Okay, now for the rest of the project…
The site generator creates a few very useful directories and files for you:
- _config.yml - This file contains basic info about your site. Open it up and fill in the blanks. You won’t need to edit this one often.
- _posts directory - This is where you add your posts as markup files. I’ll cover that in more detail in the next section
- about.md - This is what is sounds like. Fill this page in with the content for your about page.
Adding a Post
If you’re used to blogging with a rich text editor, you will need to shift your workflow a bit. If you feel uncomfortable whenever you have to leave your text editor or terminal, then this is the platform for you. Jekyll posts are just markup. I’m using markdown, so I’ll focus on that, but you can use also HTML or textile (with the proper extensions).
Writing a blog on a Jekyll site is as easy as adding a markup file to the _posts directory.
A couple things to keep in mind:
-
Your file name matters! Start with the date in kebab case (YYYY-MM-DD) and continue with the file name, also connected with dashes. It should look like this:
YEAR-MONTH-DAY-title.MARKUPFor example:
2016-01-27-ek-welcome-to-reason-about.md -
Also, I’m not sure if I mentioned this before, but you should definitely, never ever edit anything in the _site directory
Inside the file:
The first thing in every one of your posts will be “YAML front matter”. This is the metadata about the post and it’s really important. This post’s front matter looks like this:

When you create a new post, make sure to include this section with the appropriate data.
Adding images and documents:
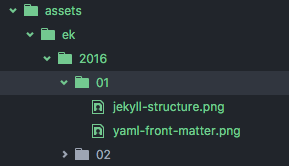
When you set up a project, you won’t have a default place to store images and files, but the Jekyll docs recommend creating an assets folder. You will need to manually create a file structure inside of it to keep things organized. Our asset folder is organized by contributor, then year, then month.
In summary, do not edit anything in the _site directory. Also, Jekyll is quite easy to use and pretty cool.
blog comments powered by Disqus