So, you’re awesome and want the world to know it? Watch out Earth, a new star is about to be born. Here is a simple, step-by-step instructional guide on how to deploy a front-end application to Firebase.
Note, this guide is for a front-end application with static files. It won’t go into deploying a server or database, or hooking up a database/server to the front-end app. This tutorial also assumes you to have a basic understanding of using your terminal.
Expect: * A couple pointers before you get rolling* * Step-by-step to deploying* * Solutions for common sticking points that trip people up*
Slow Your Roll
First thing’s first, you need an account on Firebase. So head over to www.firebase.com/login to login with Google, Github, or an email/password combo.
Second, you will need Node.js and npm installed in order to make this work. I know that’s super annoying, but these are things you’ll be a using a ton if you aren’t already, so they’re worth the time. If you install node, npm automatically downloads with it. I suggest following the documentation here. At the risk of confusing you further, Homebrew is the easiest way to download Node. It’s a package manager, which is techy for it has a library of programs you can download straight from your terminal. No more downloading .exe files and running them from your desktop. You’re a developer now.
Next, we are going to download the CLI (Command Line Interface) tools. This is will be how you get your computer to talk to Firebase. If it gets confusing, head on over to the Getting Started documentation for another run through.
First, you will run the command: npm install -g firebase-tools
npm is a package manager that was downloaded with Node.js, and it runs and grabs the firebase-tools from the internet and installs it onto your computer. The -g is called the global flag, and gives npm some additional information on how exactly you want to download the firebase-tools program. There are other flags as well, but that is a little out of scope for this lesson. Downloading it with that flag will make sure that firebase-tools is available GLOBALLY to you in any project you create on your computer.
How To Deploy Apps and Influence People
Now that we have the pesky stuff out of the way, the fun begins.
First thing is first, you need to login to firebase-tools on the command line. You do this by running ‘firebase login’ on your command line.
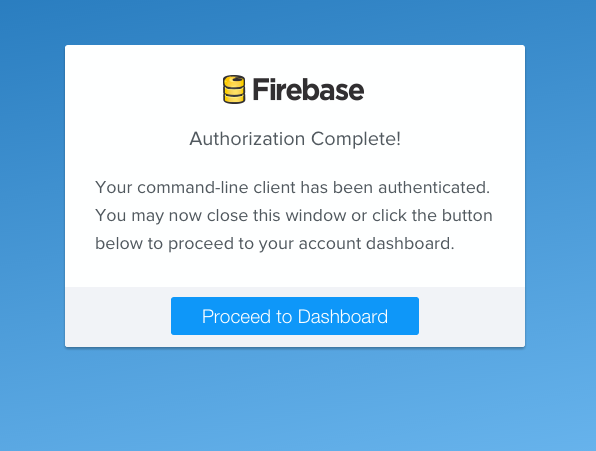
The login flow will vary slightly based on how you chose to signup to Firebase. If you gave it an email and password, you will enter those to login. Otherwise, a new tab will pop-up in your browser asking you to authorize the login.
Boom, we’re in.
Now, we have to tell Firebase what we want it to pull up to it’s servers. Make sure you’re in your project folder; this is where the index.html is going to be sitting. When you deploy to Firebase, it will pull everything in that folder up with it, and look for the index.html to serve up as the home page. Make sure the index.html is sitting in your current directory, and that your app isn’t pulling any files or assets from outside the folder, because they won’t be along for the ride and therefore, won’t show up when you check load the deployed site.
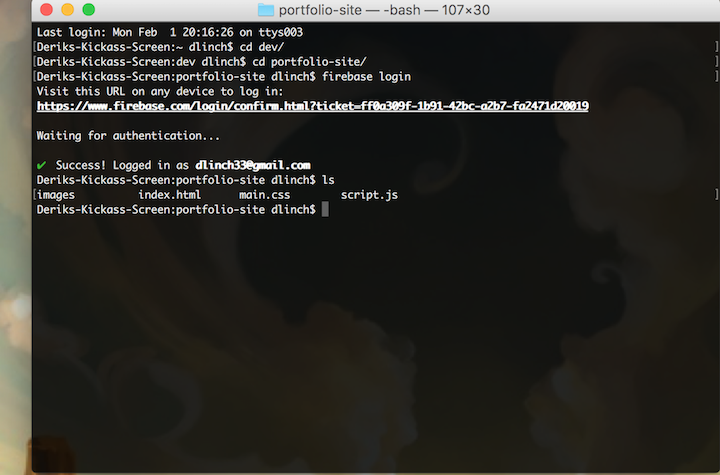
As you can see from the screenshot, this folder I’m in now is perfect. It’s where the index is sitting, and all my assets are tucked safely within.
So, how do we get the ball rolling? By issuing the command: firebase init
Firebase will ask what Firebase you want to use. This can get confusing, because the company is named Firebase, and each individual project you publish is called a “Firebase.” To cut confusion, I’ll try to be explicit when I refer to a Firebase project. If you initialized a Firebase project from the dashboard on the website, it will show up here as a list. Select the correct Firebase project. Otherwise, create a new one from the command line. Use the arrow keys to select which one you want, then hit enter. If you choose new, you have to type in the name of your new Firebase project.
The next part is the single trickiest part of the whole process. It asks what you want the public root to be. This is where Firebase will create the firebase.json, which we will cover more in a moment. This has to be the directory that the index.html is in. Remember earlier when you made sure you were running these commands while you were sitting in the project folder with the index.html in it? Tell Firebase that you want it deploy from your current folder by typing in: ./
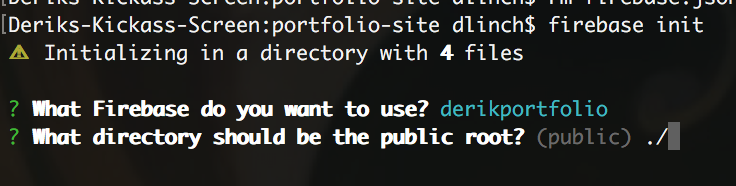
The first time I did this, I got confused and tried to type in an absolute path, and it didn’t work. Avoid my suffering.
So, if you type: ls you should see that you now have a new file, called firebase.json.
You’re almost done. Next, you’re going to type: firebase deploy
This will only work when you’re sitting in the folder that has the firebase.json. It will push all your static files to their new home online.
Anytime you make stable changes, and are ready to publish them live, simply type in firebase deploy and it will push everything again. It will republish all your files from scratch every time, so if you delete a file your project depends on and deploy again, the file will also disappear from your Firebase online and your app will break. It’s not a cumulative update like using Git.
From your command line, you can type firebase open and it will open a new tab in your browser to your new site.
Bravo!
You can login to the Firebase dashboard and see all the apps you’re running and adjust their settings. They’ll let you see the deploy history for each one, and you can rollback to a previous deploy in case you break something.
In summary, pushing to firebase is easy peasy if you have firebase-tools installed:
firebase init
firebase deploy
That’s it!
By Derik Linch
blog comments powered by Disqus